How to Unlink or Change Google 2FA
You can change, reset or even unlink Google Two-Factor Authentication (2FA) by following the step-by-step guide below.
If you have lost multiple account security settings including Login Password, Email address, Phone number, Google 2FA and Trading password, please refer to article What are Security Settings and how to reset them
Contents
1. Lost Access to Current 2FA
2. Current 2FA Still in Use, but Wish to Switch Authenticator to a New Device
3. Unlink Google 2FA
1. Lost Access to Current 2FA
1.1 Rebind 2FA Using Saved Google Setup Key
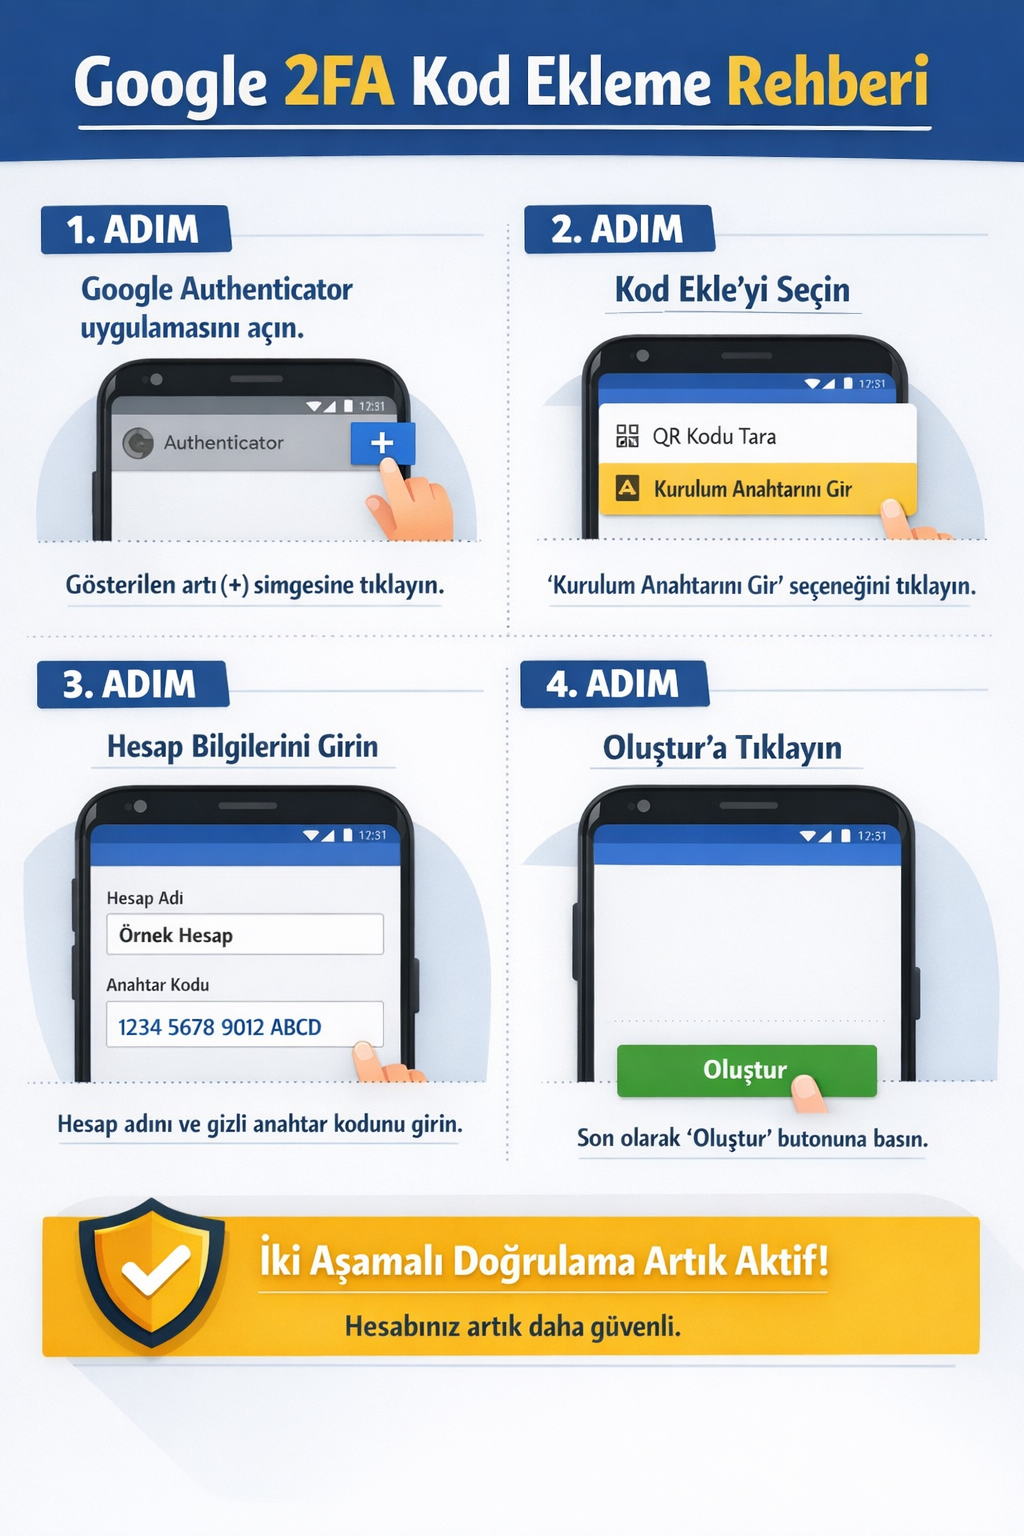
If you saved the Google Setup key during your initial Authenticator setup, you can use it to rebind Google Authenticator on your new device. Once rebound, enter the six-digit code to log in to your KuCoin TR account.Step 1: Open Authenticator App on your new device.
Step 2: Select Add Code and enter Saved Google Security Key
Step 3: Enter Account Name and the Google Security Key or Setup Key previously saved.
Step 3: Click Save and login to your KuCoin TR account with the Google 2FA code generated.
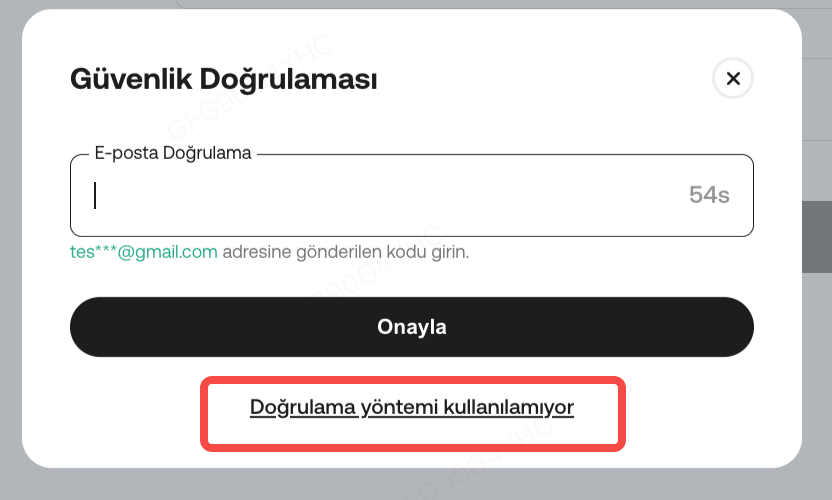
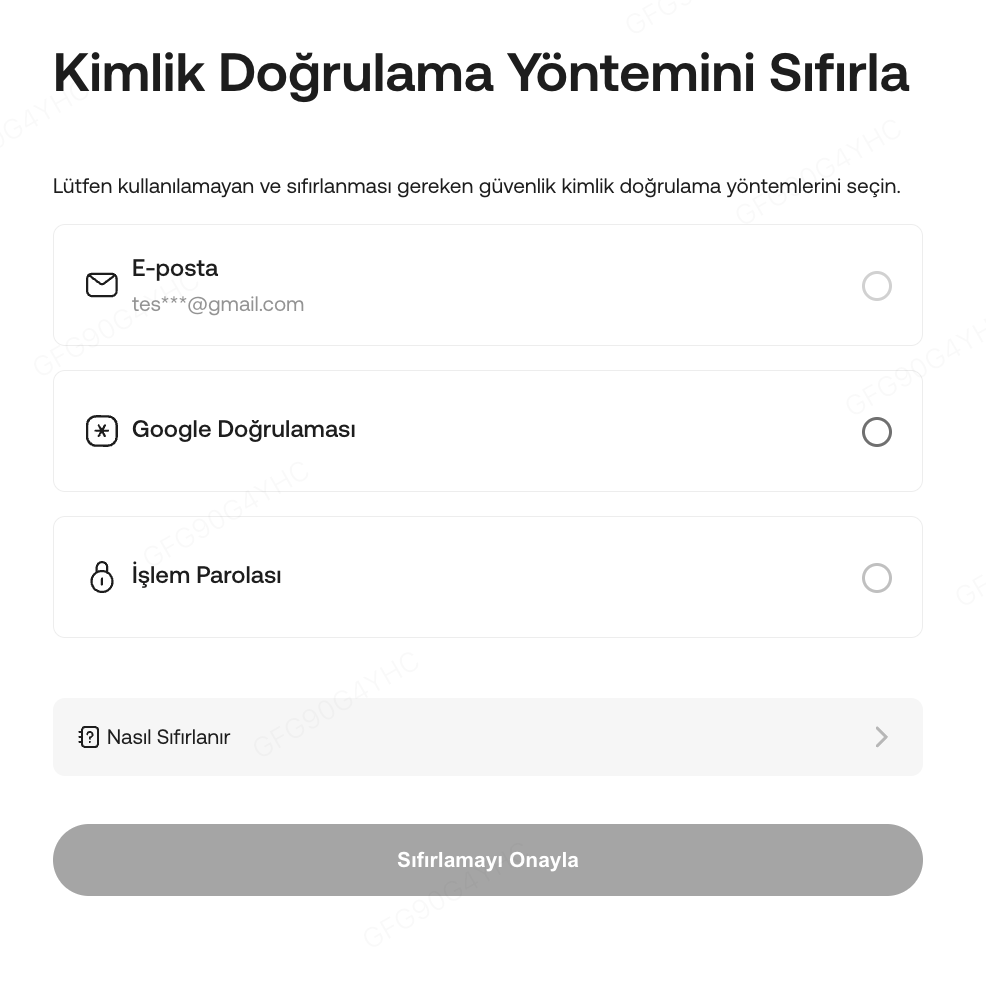
1.2 Reset 2FA Without Using Back-Up Key
2. Current 2FA Still in Use, but Wish to Switch Authenticator to a New Device
2.1 If You’ve Backed Up the Security Key
Refer to the article How to Enable Google 2FA. Use the saved key to link your Google Authenticator to your new phone, then safely delete the key from your old device.
2.2 If You’ve not Backed Up the Security Key:
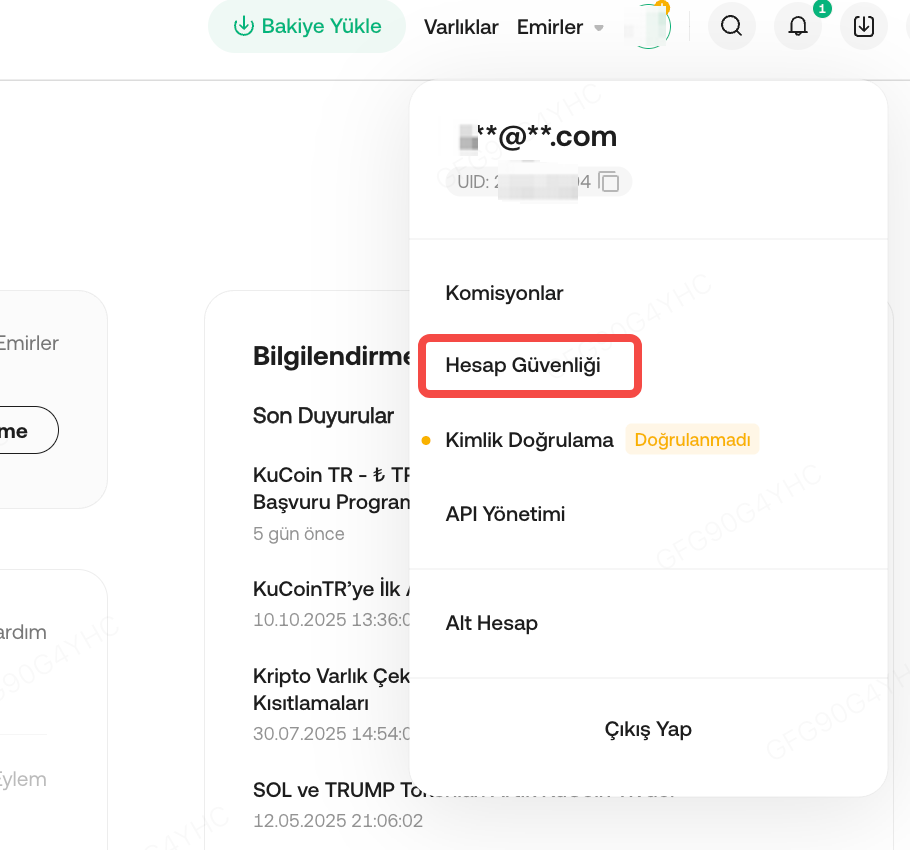
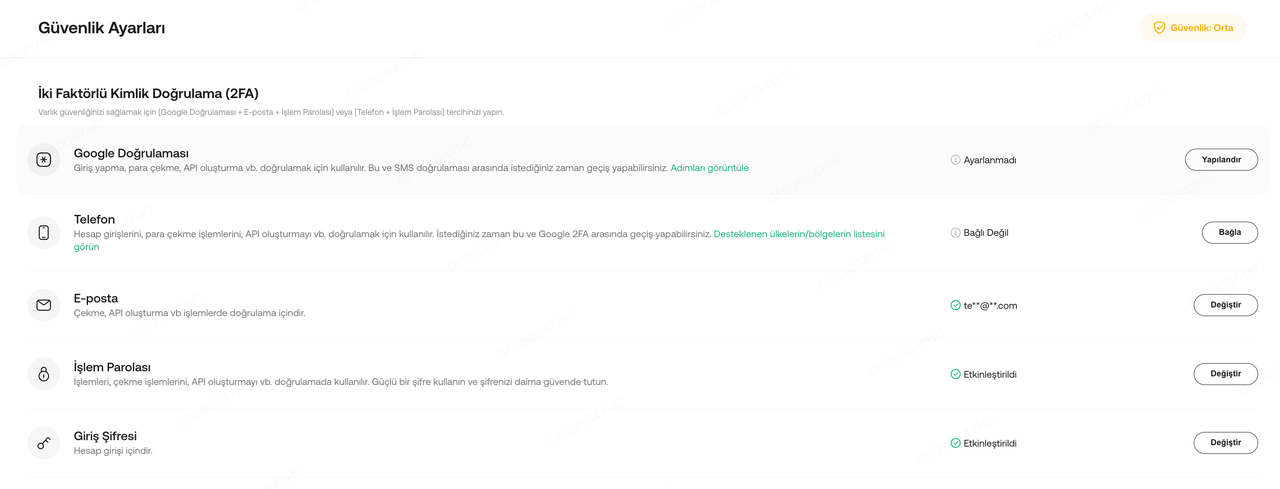
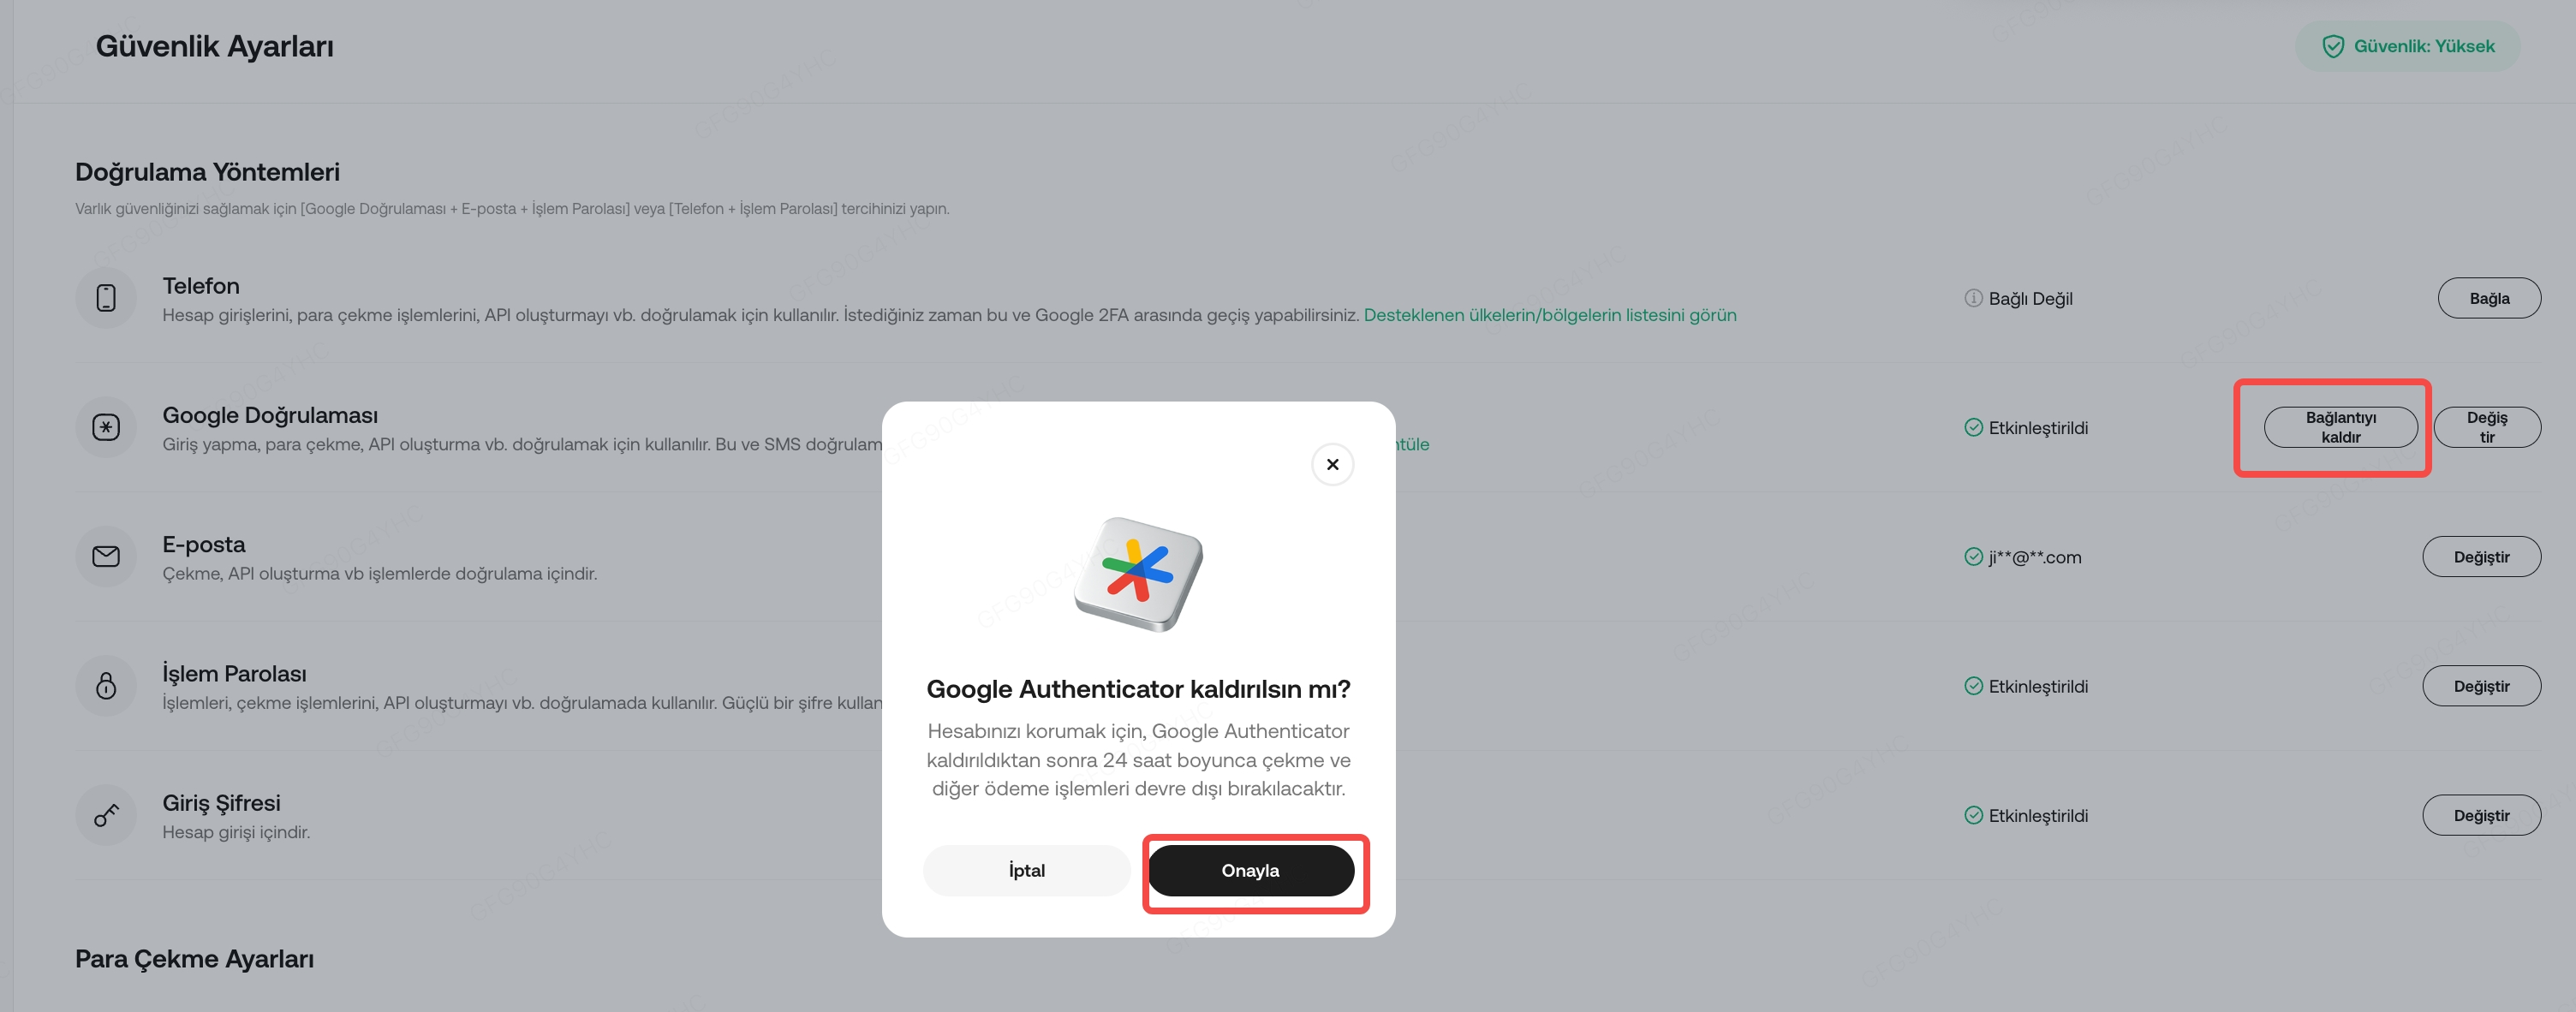
3. Unlink Google 2FA
If you do not wish to use Google 2FA as one of the account security settings, simply follow the steps below:
Note:
a. If you exit the page before clicking Activate, changes to your old 2FA will not be saved and will remain usable.
b. Withdrawals will be disabled for 24 hours after updating your 2FA settings to protect your assets.
c. Once verified and active, the system will automatically unlink your old 2FA, which should be deleted as soon as possible.
d. When completing identity verification, make sure to follow instructions closely and upload all required documents to avoid appeal rejection.
e. The '2FA unavailable?' button is only accessible via the login page in the app. If logged in, you must log out to access this feature.
f. For more information about resetting Google 2FA via web, you may also refer to this article: What Are Security Settings and How to Reset Them?
We hope this article has been helpful. If you have any other questions, please contact customer support directly, or submit a ticket for assistance.